Finishing drywall is an integral part of completing your home’s new walls, whether during a remodel or new construction. Many homeowners like to tackle this job on their own, and so they wonder how to finish drywall.
While the process of finishing drywall isn’t overly complicated, it requires a lot of attention to detail. If you aren’t a capable handyman or a construction worker, you may want to leave the process to the professionals.
If you’ve decided to try the process yourself, however, you can continue reading below. Learn every step of the process of how to finish drywall in this guide.
What Does the Term “Finishing Drywall” Mean?
What many homeowners call “finishing drywall,” people in the construction industry might call “taping and mudding.” This is the process of laying tape and mud over the joints of the finished drywall compound.
Start by Preparing the Surface
Before anything else, you’ll need to prepare the surface. Ensure all nails or screws have been driven below the surface of the wallboard. If any are still sticking above the wallboard, either screw or hammer them in.
Check that any fasteners are also fully recessed. You can check this by gently dragging a taping knife over the surface. If you find any fasteners that need to be recessed, correct them before moving forward.
The last step in prepping the surface is to visually look for any torn sections of paper. If any are found, carefully cut them away. If the paper is broken, it can decrease the holding efficiency of the drywall.
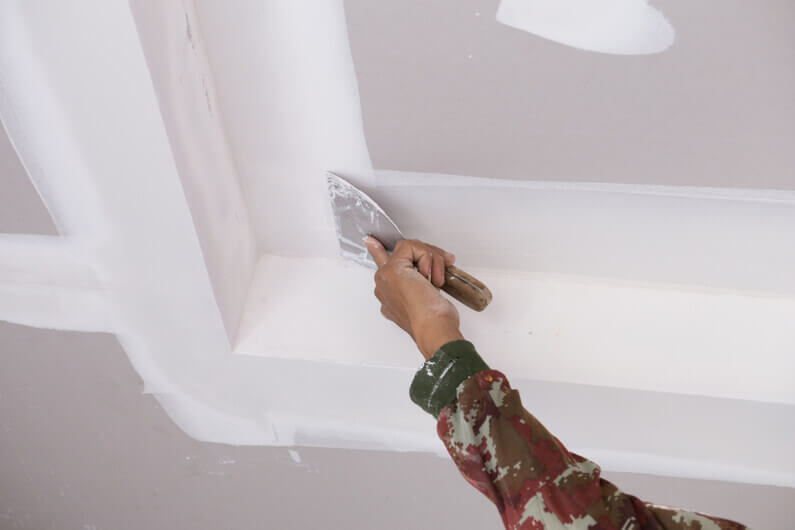
Apply the First Coat of Mud
Once you’ve prepped the surface, place some mud into your compound tray. You’ll want to use a six-inch knife to apply a thin layer of mud to the joint. Make sure you spread the mud as light and smooth as possible.
As soon as the first coat of mud is applied, place paper tape directly onto the mud. Center the tape over the joint, and hold it into place using your hand. Working from the middle, pull your taping knife towards the outside edges.
When pulling the knife over the tape, you want to apply a little pressure. There should be enough pressure to squeeze a small amount of mud out from beneath the tape. You don’t want to use so much force the tape tears, however.
Once you’ve pressed the tape into the previous coat of mud, apply another thin mud coat. Then you’ll fill in the joint. Each part of this first step should be down without pausing.
Finish the Inside Corners
Now is the time to finish the inside corners. You’ll use the same method you used to apply the first coat of mud.
The only difference might be that you use prefabricated corner beads instead of tape. Many people prefer these corner beads to finish the inside corners. However, you can still use regular paper tape if you prefer.
Finish the Outside Corners
If you already have a metal bead covering the outside corners, you don’t need to use any more tape. Instead, you can simply apply the mud over the face of each corner using a drywall knife.
If you don’t already have a metal bead covering the outside corners, you’ll repeat the process mentioned above.
Cover the Nail or Screw Heads
Now you’ll need to cover any nail heads or screws. You want to apply a small big of mud over the top of each exposed head until the drywall surface is smooth.
Once the nails and screws have been covered, allow the mud to dry overnight. If the mud isn’t dry in the morning, you may need to allow for additional drying time before moving on to the next step.
Apply the Fill Coat
Once the mud from previous steps has dried, sand the compound lightly. Don’t sand it too much, but ensure the surface is smooth. If you sand it too much, you won’t have enough dried compound left.
Once you’ve got a smooth surface, spread a liberal layer of new compound onto the joints. Feather the edges of the compound, applying with a ten or twelve-inch knife.
When this next layer of drywall compound has dried, lightly sand the surface once more. Remember to keep the sanding light, or you’ll have to add more coats of drywall and repeat the previous steps.
Apply the Finish Coat
If you were careful with your previous applications, you should only need a very light application of compound for the finish coat. You’ll want to use the widest drywall knife you have to apply this last coat. Be careful to keep it as smooth as possible.
Finish Sanding
You’re almost done. After applying the finish coat, you’ll want to sand the compound one last time. Once you’ve finished sanding, dust the wall to remove any leftover debris.
Once you’ve finished sanding and dusting, the drywall is completed. At this point, you can add texture, wallpaper, or paint to the wall, if desired.
Do You Have More Questions About How to Finish Drywall?
The process of finishing drywall requires a lot of steps. Still, it shouldn’t be difficult for someone with a moderate amount of handyman experience. If you don’t feel comfortable tackling the process described above, it’s best to hire a professional.
Do you have more questions about how to finish drywall? Or would you like to inquire about professional drywall finishing?
Contact us today. One of our associates would be happy to answer any questions you still have. They can also help you set up a consultation for professional services if desired.